core
Install git - https://git-scm.com/downloads
- What is Git? - a free, open-source version control system (DVCS) that’s used to store and track changes to source code.
- Git and GitHub are two different things. Git is a
version controlsoftware, while GitHub is a hosting service for Git repositories. - Example: In a video game, you have checkpoints that let you go back to a specific point if you die or leave the game. Similarly in code, Git allows you to create “checkpoints” called
commits. Each commit acts as a save point, capturing a snapshot of your project at that moment. If something goes wrong or if you want to explore a different idea, you can revert back to a previous commit, just like returning to a checkpoint in a game.
Terminologies:
- Repository (Repo): It’s simply a folder that contains multiple files and may also include additional subfolders.
- Command -
git --version- displays the installed Git version. - Each folder (repository) must be initialized with Git using
git initto enable tracking. Only Git-initialized folders can have their files tracked individually, and different folders can be managed independently. - Git initialization
git initis a one-time setup per project, creating a hidden.gitfolder. This folder stores the entire project’s history, tracking changes for all files and subfolders within the repository. git status: Shows the current state of your working directory, including tracked, untracked, and modified files.
Example for tracking an entire folder:
- Create a folder locally named
gitone. - Move into the folder using the command
cd gitone. - Type
ls(Linux/macOS) ordir(Windows) to see the list of files within thegitonefolder. - You can also type
ls -la(Linux/macOS) ordir /a(Windows) to view hidden files and folders within thegitonefolder. - Make it a habit of running
git statusfrequently to stay aware of changes in your working directory, track the status of your files, and avoid unintentional commits or mistakes. git init: Use this command to initialize a new Git repository in your project folder.- After running
git init, rungit statusagain to check the current status of your repository. It will show that the folder is now a Git repository, and any untracked files will be listed. - Now, your
gitonefolder is being tracked by Git, and any changes made to files within it can be managed through Git commands. - Now, try running
ls -la(Linux/macOS) ordir /a(Windows) again, and you’ll notice a hidden.gitfolder. This folder contains all the necessary files to track your project’s history and changes. - You should NEVER go into the
.gitfolder and MODIFY anything manually. Doing so can corrupt the repository and cause Git to lose track of your project’s history and changes.
A “commit” is like a checkpoint, as discussed earlier in a game. It captures the state of your project at a specific moment, allowing you to return to it if needed.
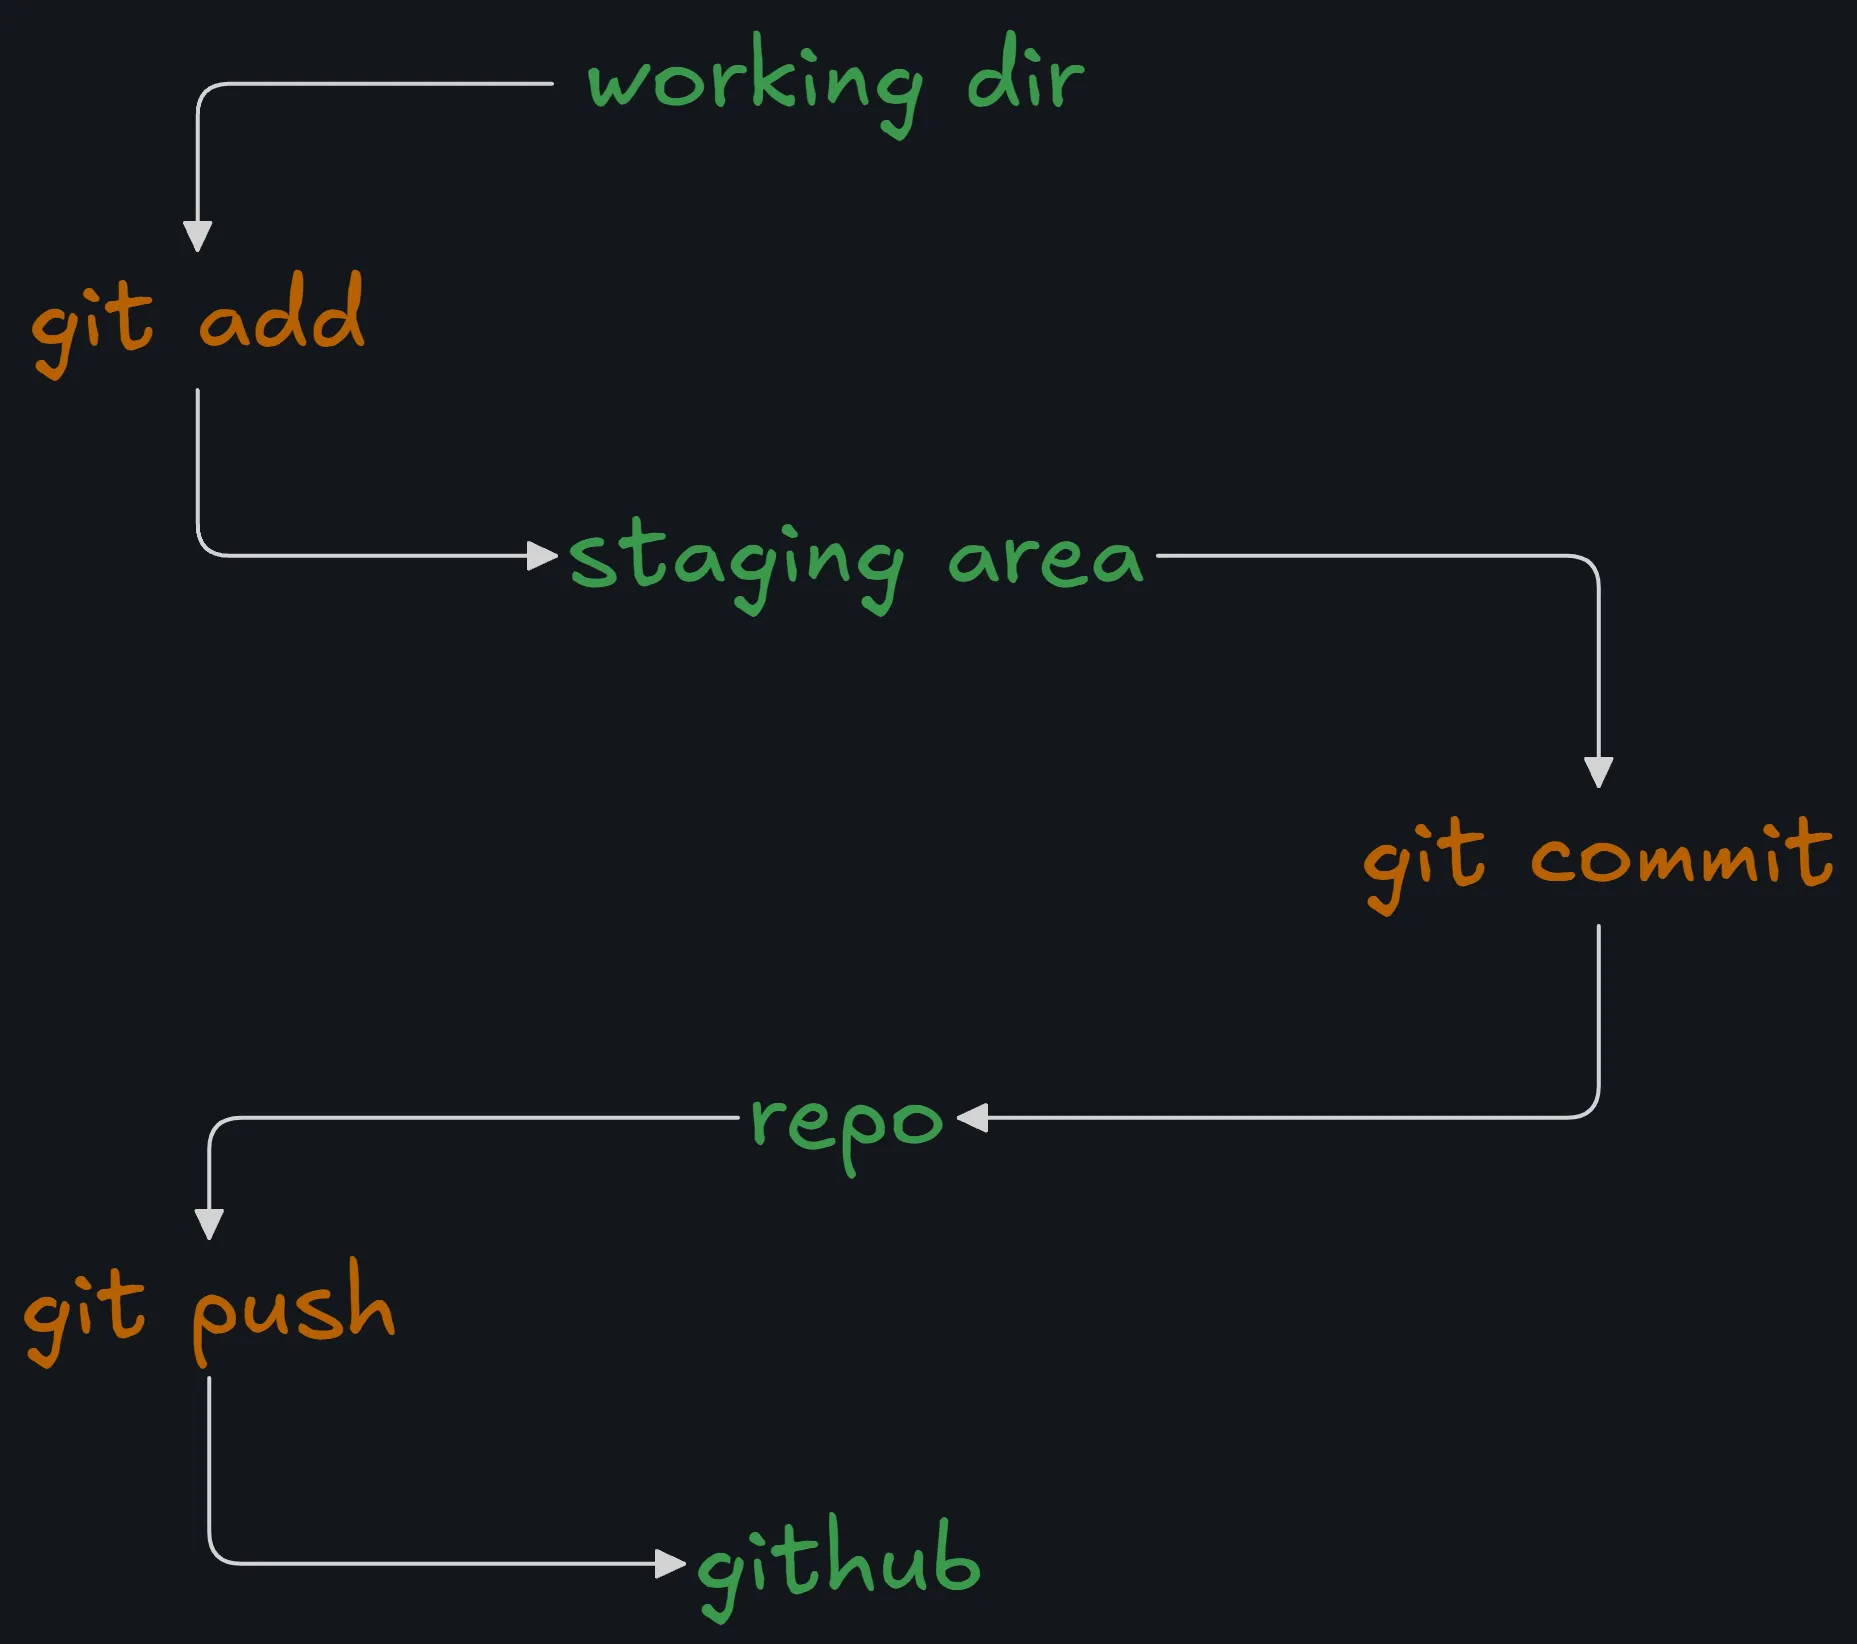
- Working Directory: First, you need to create a working directory, which means you must initialize it with
git init. - Next, use the command
git add <file_name>(not just git add), orgit add .to add all files in the current directory. This command moves the specified files into the staging area. - Staging Area: This is the place where your changes are ready to be committed but have not been committed yet. Think of it as “ready to make a checkpoint.” It’s where you prepare your changes before officially recording them.
- Once you’re ready, use the command
git committo create a commit, which acts as a checkpoint. After you run this, the repository enters the commit stage, and your changes are saved in the local repository. - To upload your repository to a cloud provider like GitHub, use the
git pushcommand. This uploads all the files from your local repository to GitHub, making your project available online.
Let’s dive into a practical example to better understand the workflow!
Prerequisites: Visual Studio Code (VSCode) and Git. Make sure you are signed in to Github within VSCode
-
Create a Folder:
First, create a new folder on your computer, and then open it in Visual Studio Code.
-
Initialize Git Repository:
Inside VSCode, open the terminal and run the command:
git initThis will initialize a new Git repository in your folder.
-
Check Git Status:
Run the command:
git statusThis will show the current state of your repository, confirming that the folder is now being tracked by Git.

-
Create Two Files:
Inside the folder, create two new text files:
testone.txttesttwo.txt5. Now, to start tracking changes for thetestone.txtfile, run the following command:
git add testone.txt
- Now, run the following command to check the status:
git status
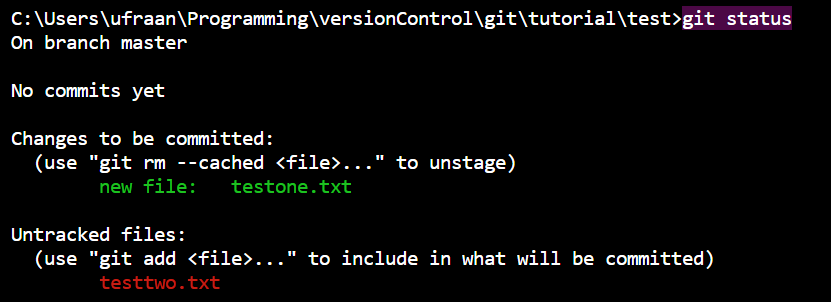
The git status output shows you're on the master branch with no commits. testone.txt is staged for commit, while testtwo.txt is untracked as we had not mentioned it in the previous command.
- To commit your changes, use the command:
git commit -m "Your commit message"
This creates a snapshot of the staged changes with the message you provide, describing what the commit includes.
For example:
git commit -m "Add testone.txt"

Make sure to write meaningful commit messages that clearly describe the changes you've made.
Just a reminder, we are here exactly in the workflow:
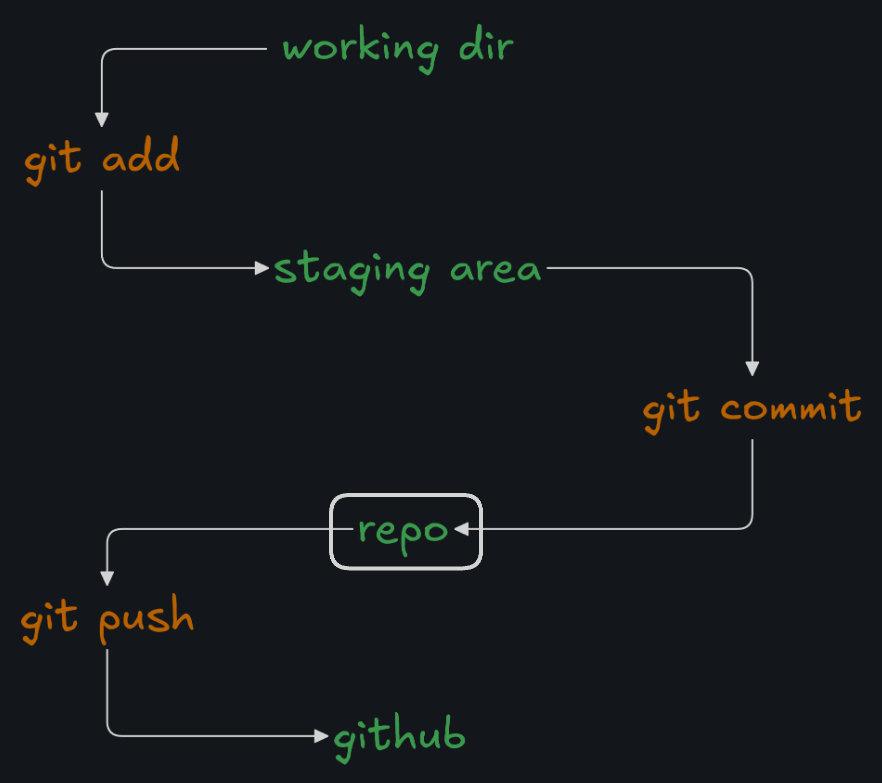
in the REPO stage
-
Now, go ahead and run
git statusagain. You should see something like this: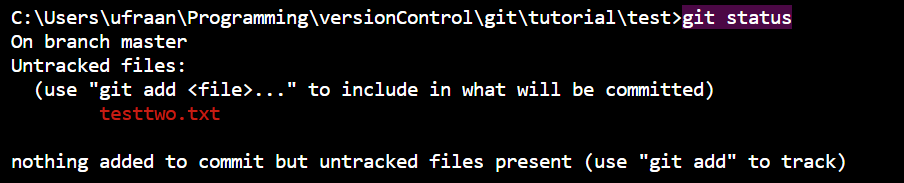
This means that testtwo.txt is still untracked and hasn't been added to the staging area yet. -
Let’s add
testtwo.txtto the staging area by running the following command:git add testtwo.txt. -
Now, try committing
testtwo.txton your own with a meaningful message! -
After committing, you can run
git logto view the commit history and see the details of your recent commits.
Congrats. You’re done with the absolute fundamentals..
Atomic Commits: Focus on one feature, component, or fix per commit. Avoid adding unrelated changes in a single commit. One Commit, One Fix: If you’re fixing bugs, commit each bug fix separately—one commit for one bug. Commit Message Tense: There’s a debate on whether to use present or past tense in commit messages. Official Recommendation: Use present tense in the imperative mood (e.g., “Add a function to connect to the database”). Personal Preference: While the official guideline is clear, how you write your commit messages is ultimately up to you.
Related: Git Internal Working and Configs.