research
paper:
let’s talk about how computers represent images. the standard color space that computers use is the RGB model.
every pixel of an image stores 3 values. from 0 to 255. with higher values representing a larger weighting of the respective color.
we know that a bit is the smallest unit of digital information (a 0 or a 1). using 8 bits for one color channel (for ex red,) means that channel can have $2^8$ = 256 different intensity levels, ranging from 0 (no intensity) to 255 (full intensity).
this applies to all three channels: 256 levels of red, 256 levels of green, and 256 levels of blue. the bracket shows that to determine the color of a single pixel, you combine the bits from all three channels: $8 \text{ bits (Red)} + 8 \text{ bits (Green)} + 8 \text{ bits (Blue)} = \mathbf{24 \text{ bits / pixel}}$
This 24-bit structure is what allows for the vast range of colors we see in modern displays. The total number of unique colors available is $2^{24}$, which equals 16,777,216 colors. This is why it’s often called “True Color,” as the human eye generally cannot distinguish between more subtle color variations than this offers.
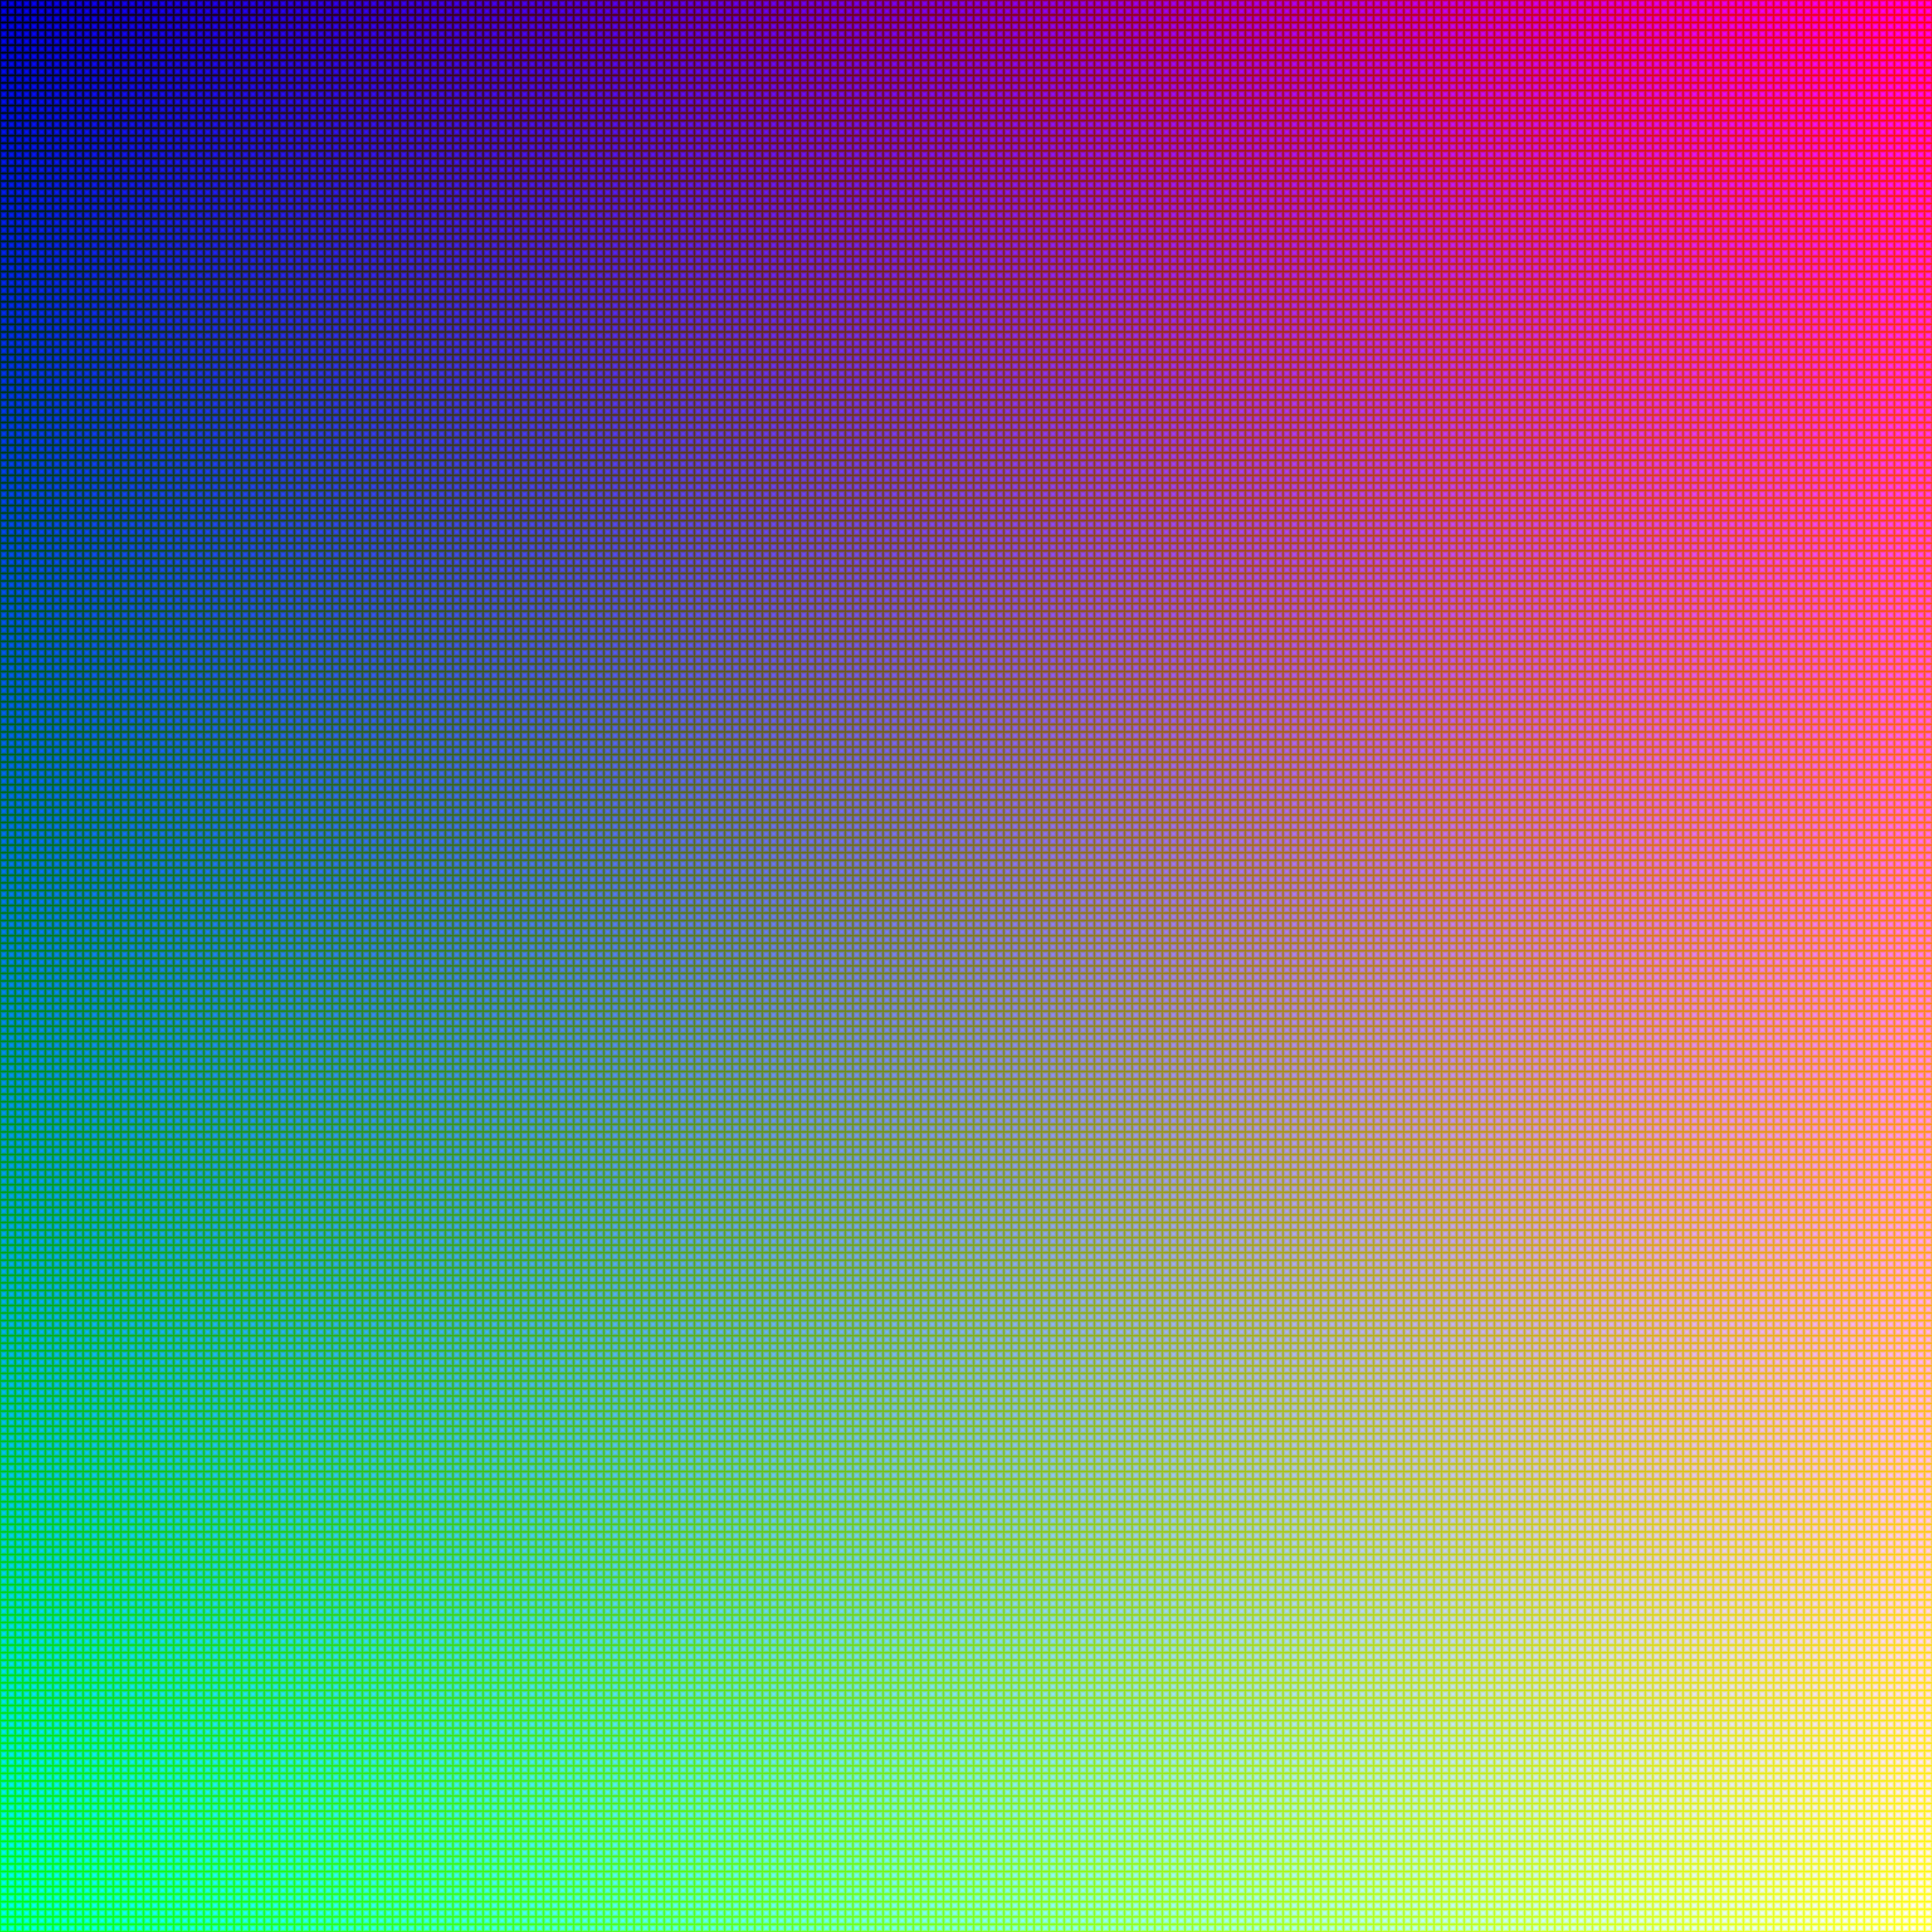
all 16,777,216 colors:
 a byte is a standard grouping of 8 bits.
$$ \frac{24 \text{ bits}}{1 \text{ pixel}} \times \frac{1 \text{ byte}}{8 \text{ bits}} = \mathbf{3 \text{ bytes / pixel}} $$
this is the amount of digital memory (storage or transfer size) required to define the color of just one single dot (pixel) on the screen.
so let’s take this image here:
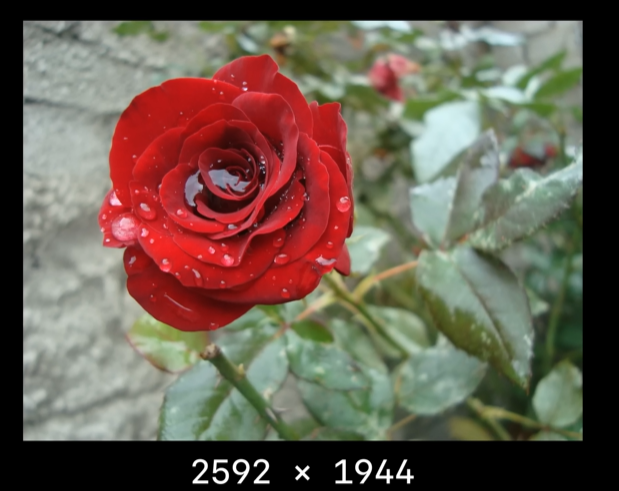
its dimensions are 2592 x 1944 pixels. that is = 5038848 pixels.
so according to our calculations, 5038848 * 3 = 15116544 bytes ~ 14.41 MB.
but with JPEG compression, the actual file is only 0.8MB.
same number of pixels but 5% of the expected size.
this is the real magic of jpeg compression :) with minimal affects on quality of the image. it uses lossy compression.
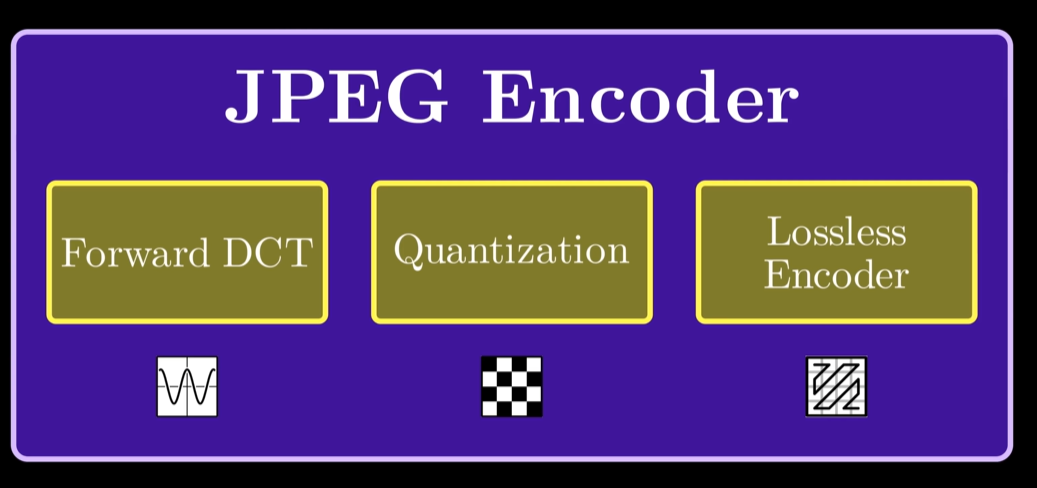
first try to understand about image compression from a high level overview.
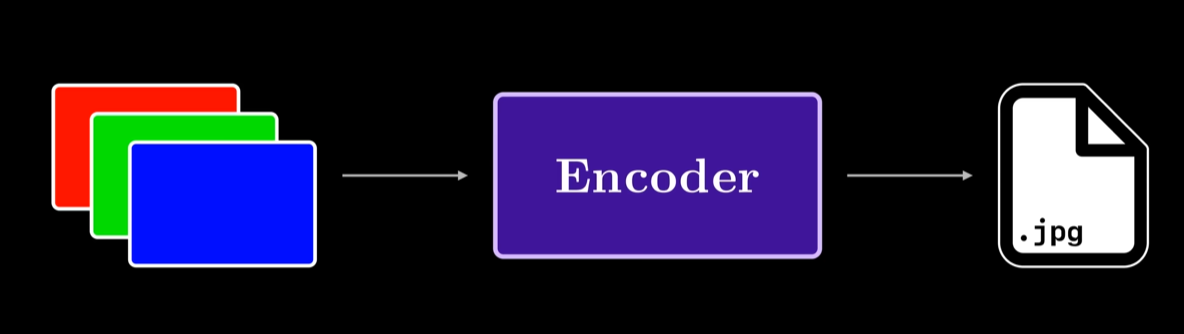
first we take an RGB representation of an image, and then we encode it using a compression algorithm. this encoder gives us the jpg file which we store in the memory which is quite different from the original RGB representation we used earlier.
so part of a compression scheme requires also defining a ‘decoding component’ that decodes the stored representation of our data, into the RGB format that a computer can render as an image on the screen.
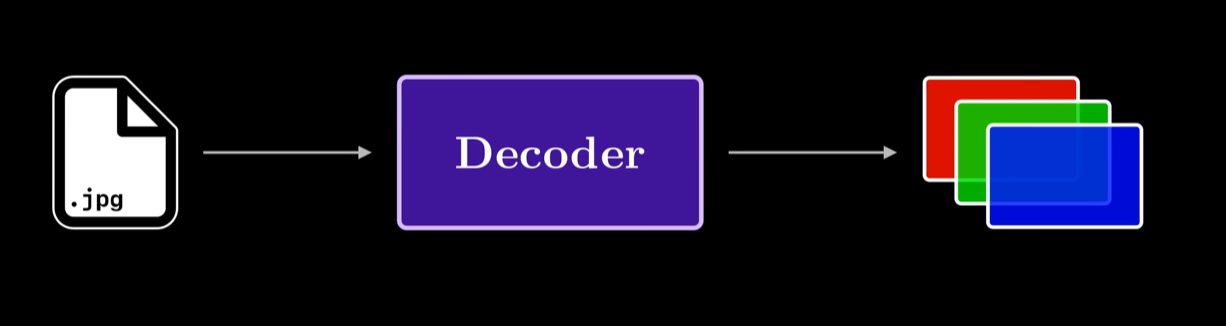
part of the JPEG standard is defining how both the encoding and decoding work.

also the key point in JPEG standard is that the final decoded image is not going to be the same as the original uncompressed image.

this is why we call it ‘lossy’ compression. in this compression part of the pipeline, we are going to deliberately lose information. to get compression on the levels of 5%, there’s really no other option other than to ACTUALLY discard some inforamtion from our OG image.
now u might be asking, what sort of information from an image are we getting rid of and how do we get rid of it?
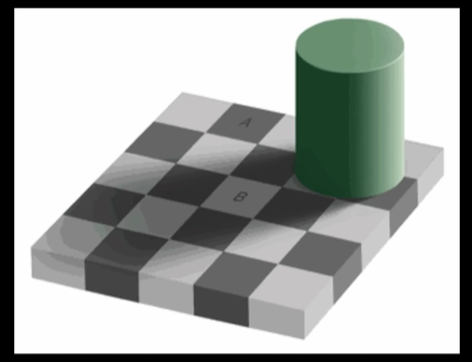
here’s an image.
if i were to ask you, what colors were the tiles A and B, u would mostly say A is a darker shade of gray, than B. but what if i told u, A & B were actually the same color…!
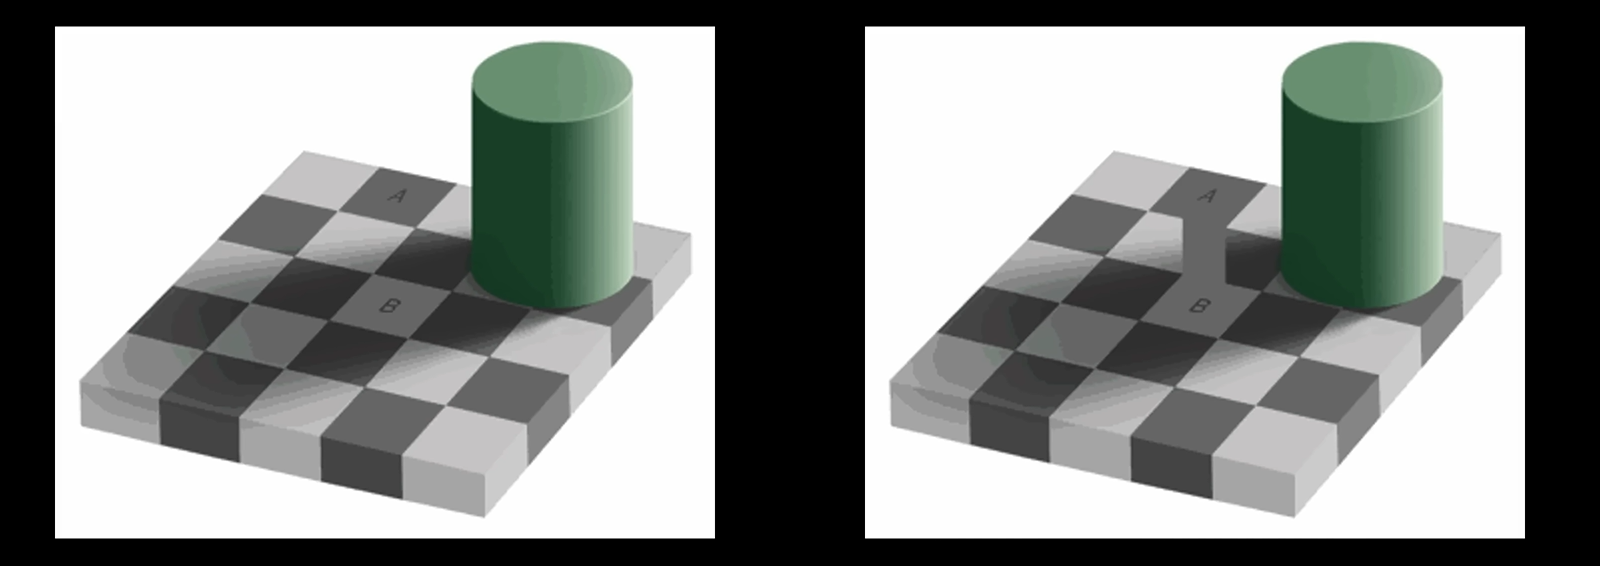
in this, we have a common connector through which we can see that they are of the same shade/color.
so what is going on here.
through experimentation, scientists have found a very interesting finding about human eyes.
our eyes are much more sensitive to brightness than they are to colors.
and a part of the JPEG compression scheme can take advantage of this. to understand about this, we have to dive into the world of color spaces.
as we previously discussed, the RGB color space is a combination of red, gree, blue color components.
if we put each value on a separate axis, in a 3d space, we can see how all possible colors are just a point on this cube.
one aspect of this is that, as u go on the diagonal from the origin to the color 255, 255, 255, u get gradually brighter colors.
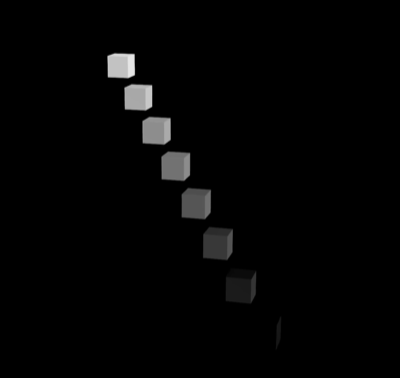
the exact line between these points defines all possible grayscale colors, which are a direct measure for brightness.
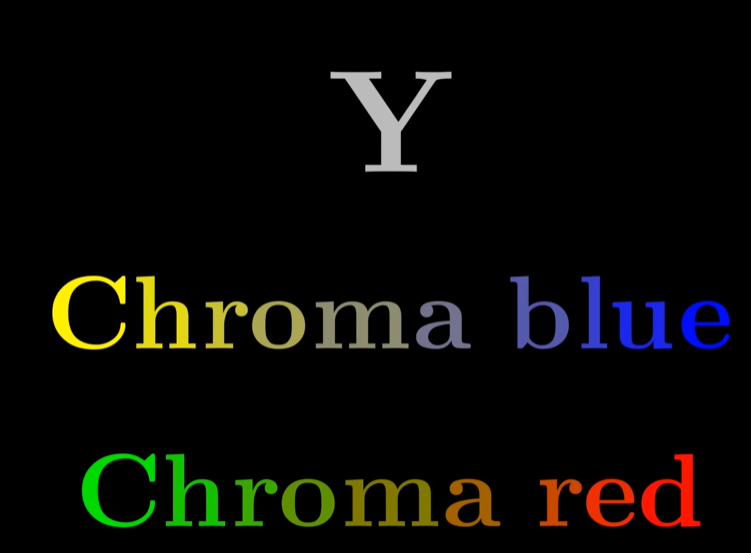
this ‘idea’ ****of separating brightness is core to another color space called YCbCr

Y measures the ‘Luma’ or the ‘Brightness’ of an image
Cb and Cr are what are going to encode the colors into that ‘Luma’ of Y
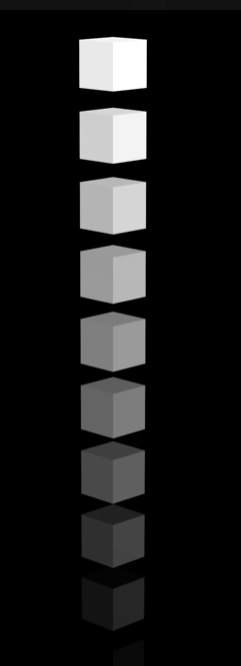
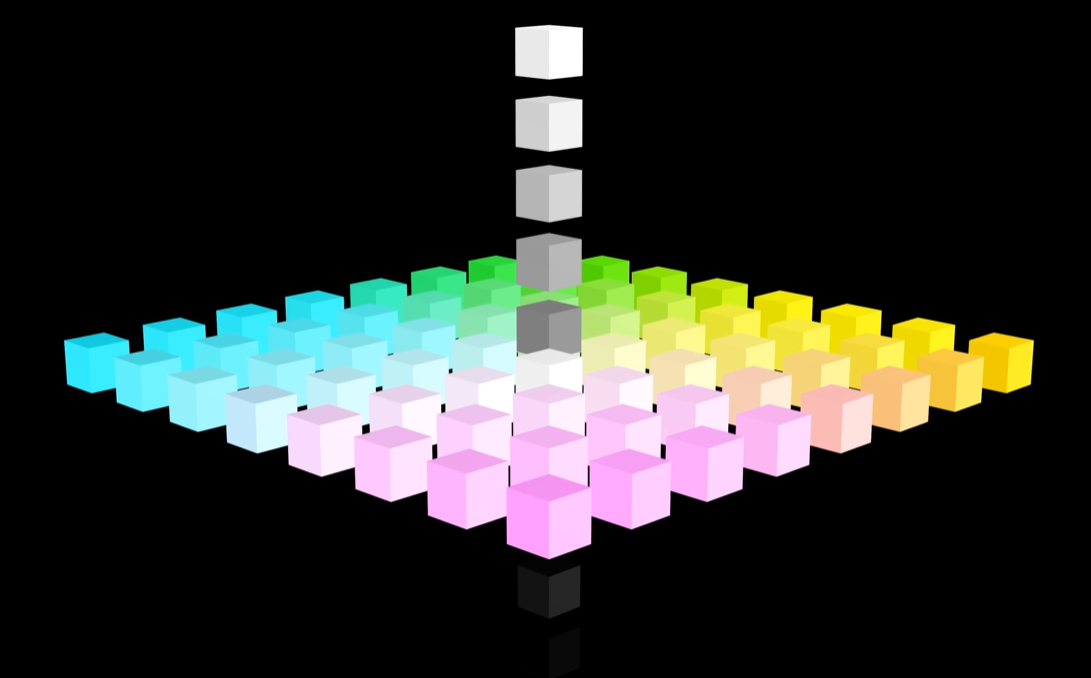
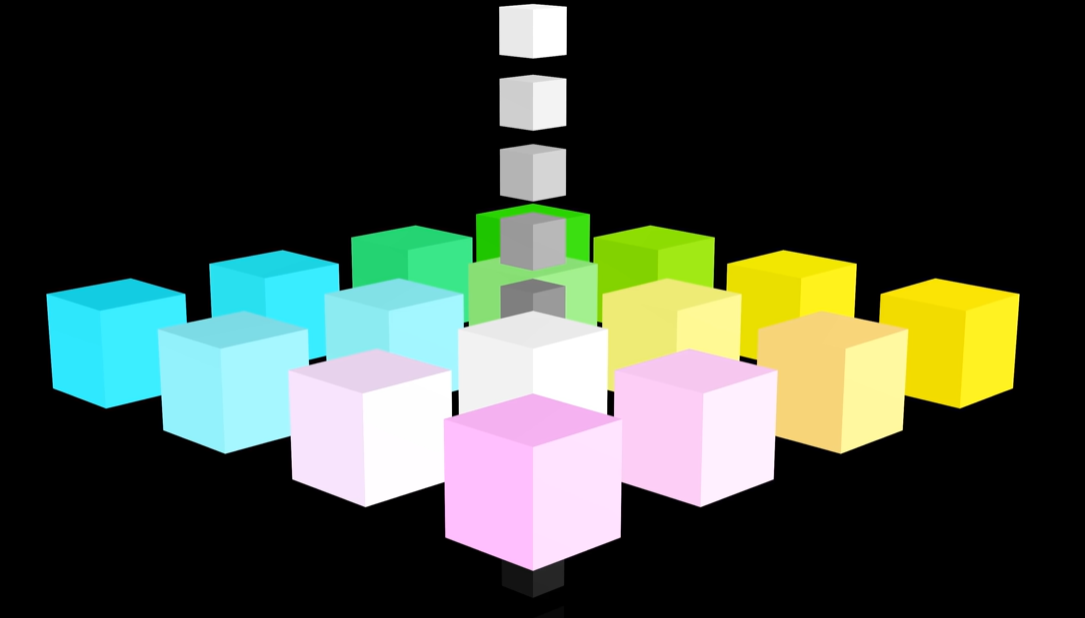
if we look at the color space, the ‘Y’ can be thought of as the single vertical axis with larger values encoding more and more brightness.
for our purposes with jpeg, using the color space gives us direct access to the part of color that our eyes perceive best.
as a result of being more sensitive to ‘brightness’ than ‘color’, one idea to compress our original image involves sampling less of the Cb Cr components, and keeping all of the ‘Luma’ components.
this technique is referred to as ‘Chroma downsampling’ or ‘Chroma subsampling’
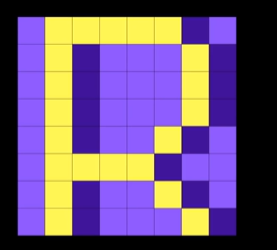
suppose i have this 8x8 image:
which has the following Y, Cb, and Cr components:
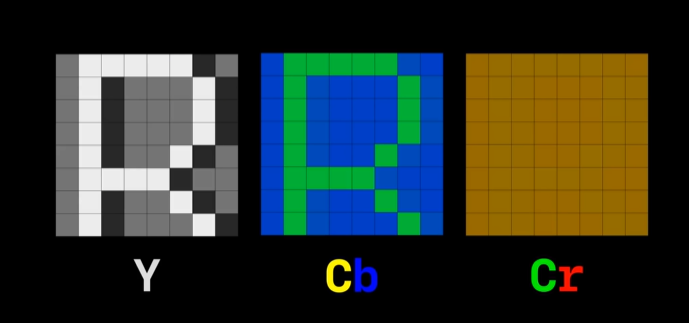
the key idea of ‘chroma down sampling’ or ‘chroma subsampling’ is to take fewer samples from Cb & Cr components since our are eyes are less sensitive to them.
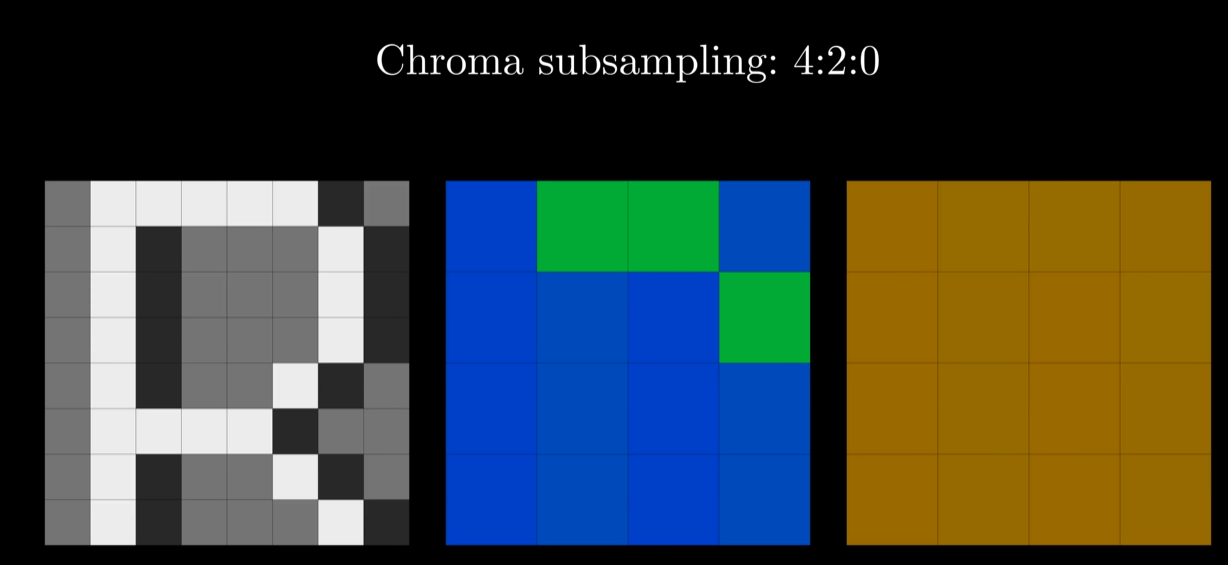
we go through our original 8x8 image ,in 2x2 blocks and simply avg the group of pixels, to get a shared value of the 4 pixels in the original image.
averaging the pixels is all what downsampling really means.
chroma subsampling is the same exact idea, but instead of averaging, we just choose one of the samples, usually the top left corner pixel to be the color of the entire 2x2 pixel block.
once we have these fewer samples from the color components, we can merge them with the ‘luma’ component, which will retain the original 16 pixels. and this gives us our subsampled image.
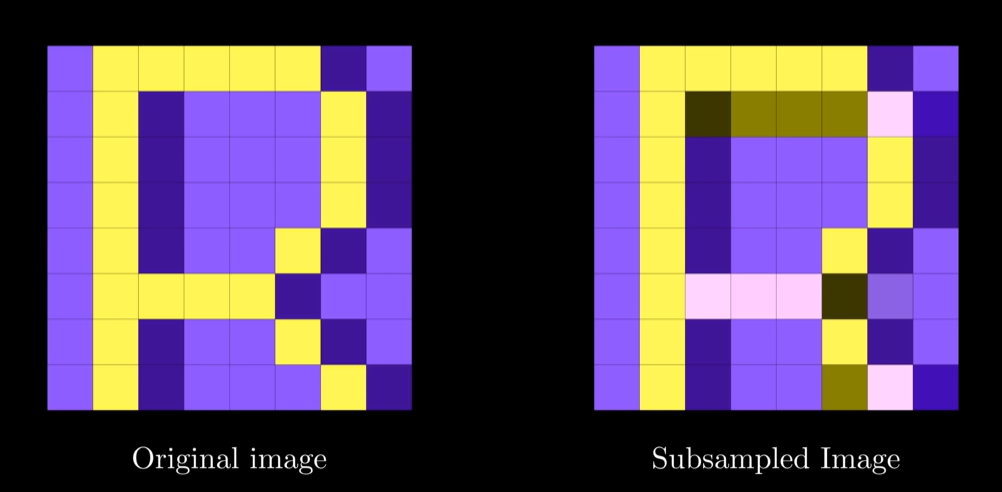 in this above case, u can see quite a difference since our 8x8 pixel is significantly scaled up.
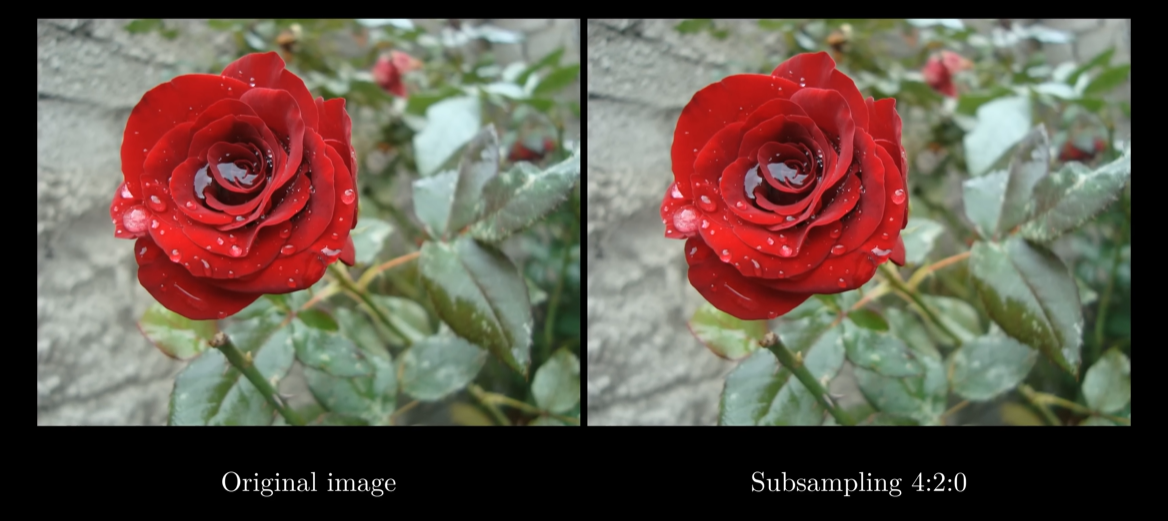
but in real word image, it is often very very hard to see any changes after subsampling
 my merging 2x2 blocks on the Cb Cr channels into one color, we are left with 1/4 of the original data in each color channel, shrinking the total file size by 50% as calculated below:
![]() well this is still quite far from the 5% mark we saw in JPEG, so we are have to exploit more than just ‘human perception of brightness’
well this is still quite far from the 5% mark we saw in JPEG, so we are have to exploit more than just ‘human perception of brightness’
for the following components of jpeg, let us focus on the ‘Y’ channel, which essentially defines grayscale images.